etchGPT
Welcome To The Future...
Like many of you, I've incorporated interactions with GenAI into many of my daily habits. Perhaps like you too, this comes with some accompanying physiological discomfort: after a while, my fingers tend to grow weary of typing and my eyes feel the strain of the harsh backlight of my computer screen. I knew there had to be a better way so I grabbed a spare Etch-a-Sketch and set to work.
The Plan
Imagine a future in which we can summon LLMs with merely our voice, and receive their instruction on pleasingly analog modalities. My vision here was that I would command my creation ("Hey Etch, how do I flip a pancake?") and I would receive back the answer written neatly on an Etch-a-Sketch a la Buddy the Elf.

Gathering The Components
To get things working, I cobbled together the following supplies:
- A Raspberry Pi (4B in my case), for being the brains of the operation
- A Good Ol' Etch-a-Sketch, which I will henceforth occasionally refer to as the 'Sketch
- A cheap USB mic, for recording my voice prompts
- 2x Nema 17 Stepper Motors, for controlling the knobs
- 2x DRV8825 Drivers, for controlling the motors
- 2x 5mm-to-6mm shaft couplings, for affixing the motors to the `Sketch
- A custom mounting frame, to hold the motors and couplings steadily in place
Building the Frame
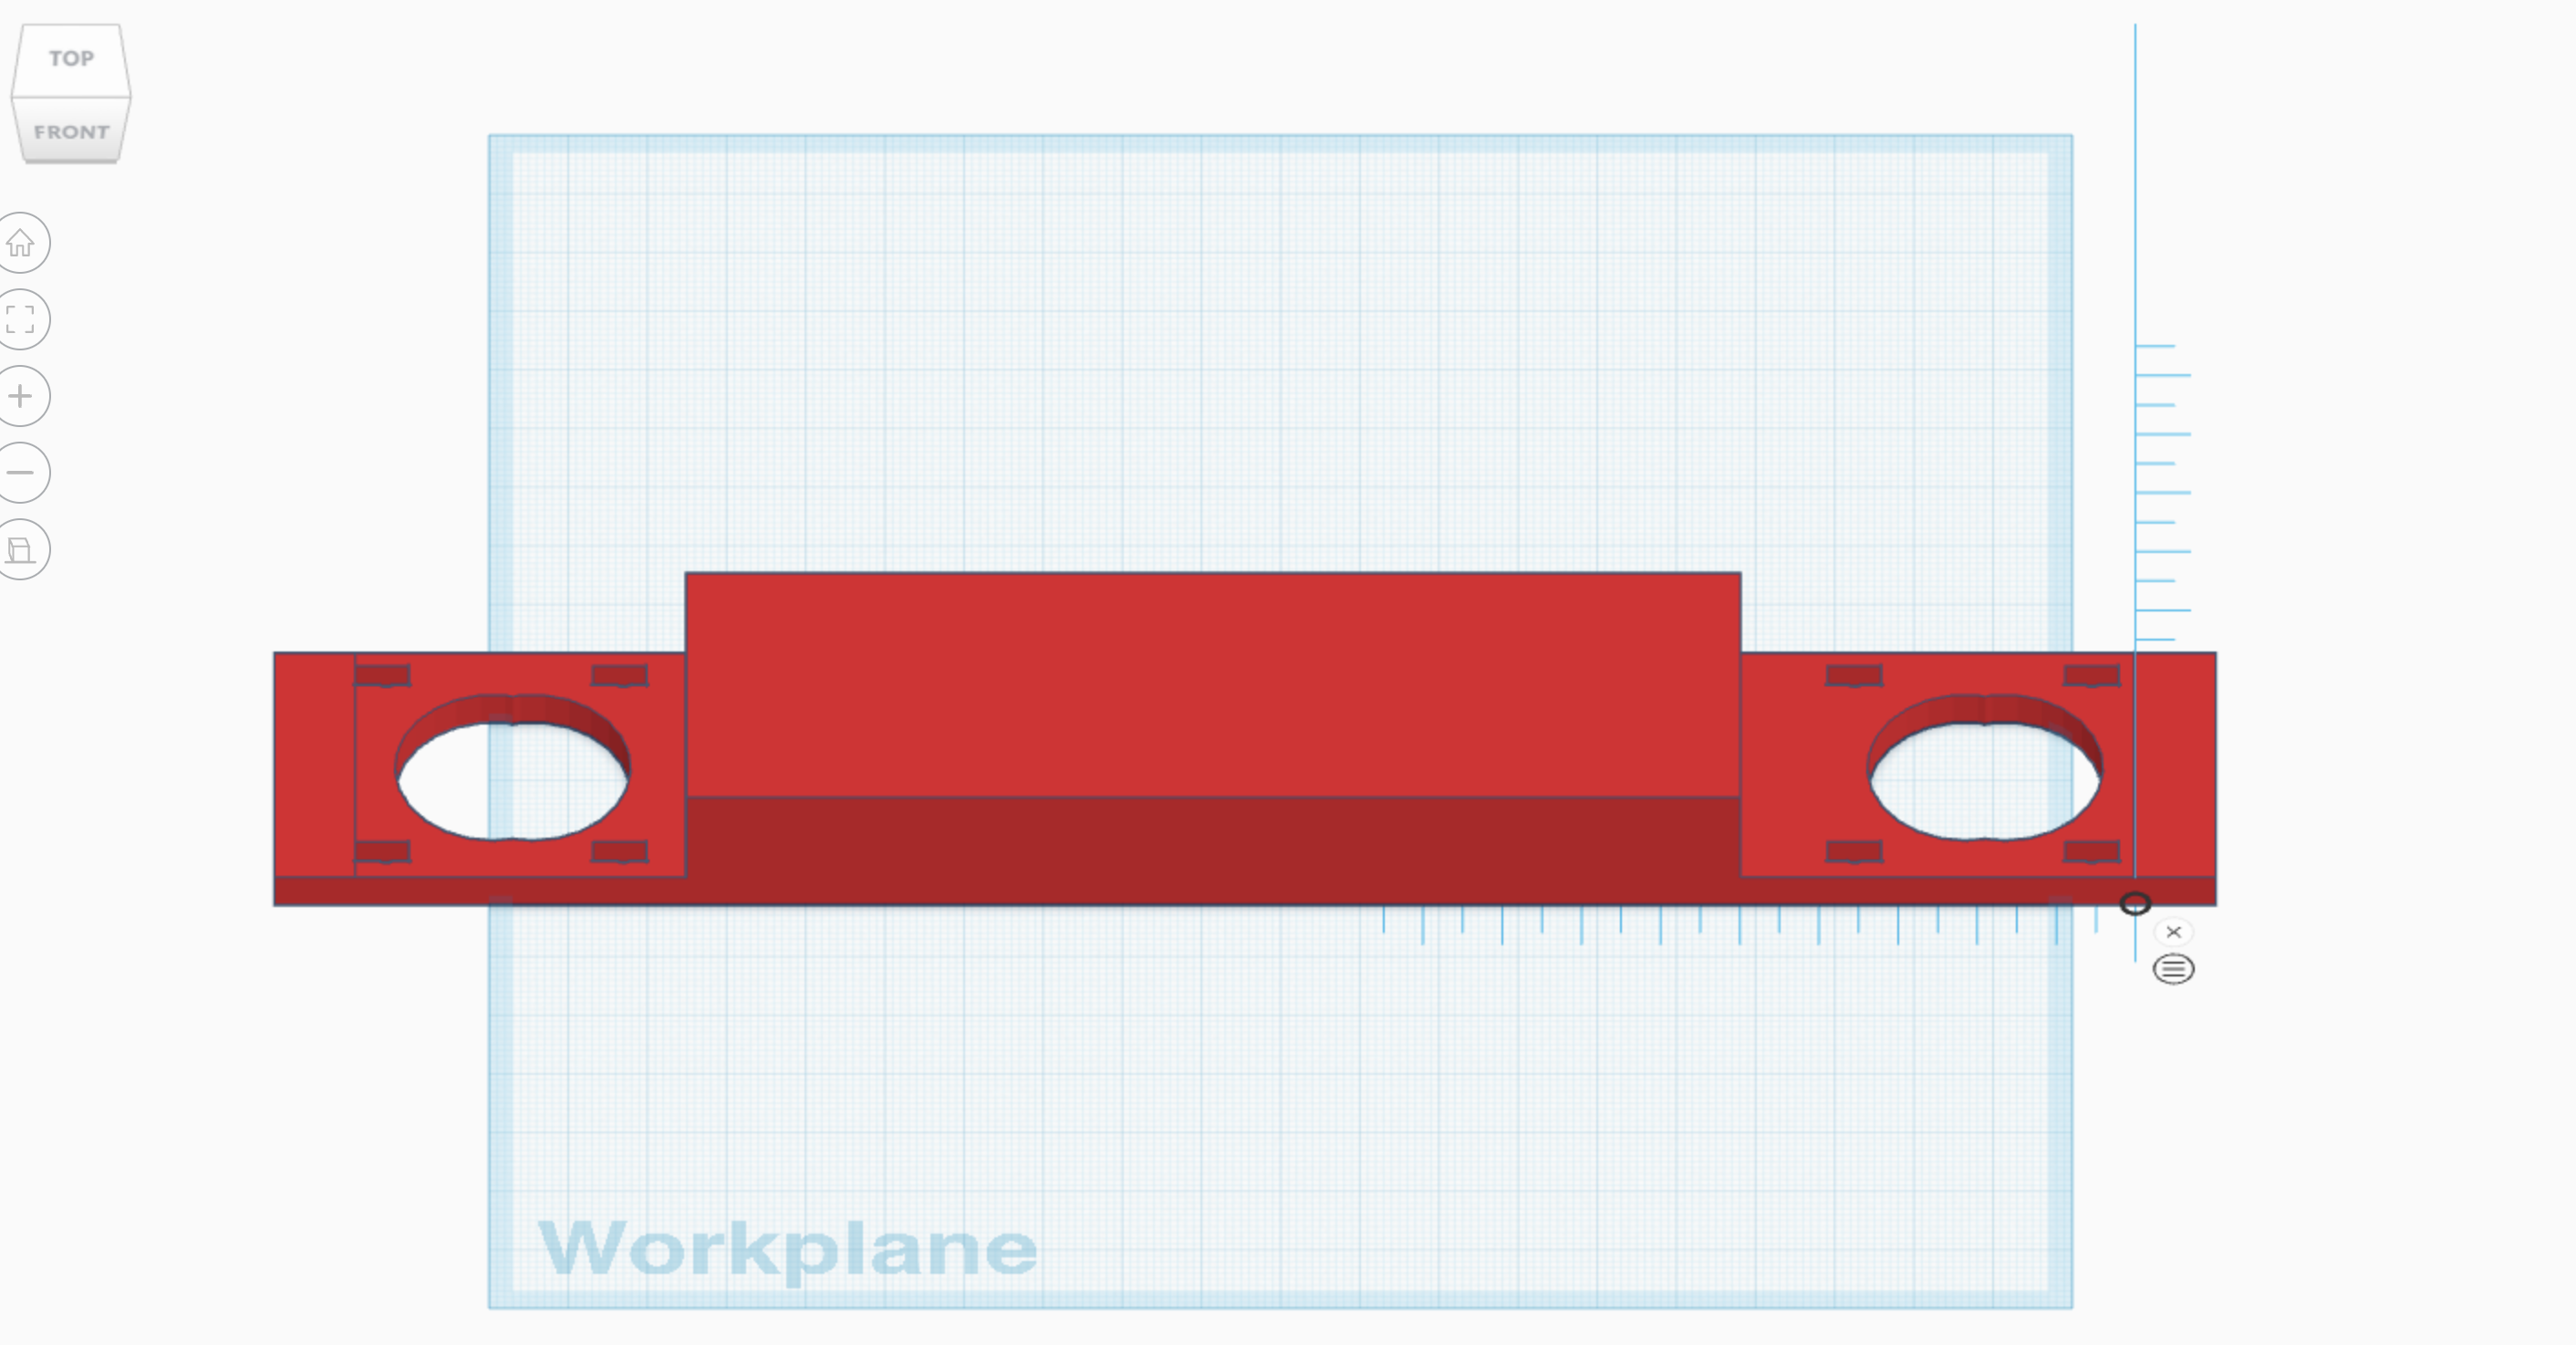
I'm a bit of a novice when it comes to 3D printing. Definitely more along the lines of "Good 'nough for government work". My TinkerCad prototype frame was a bit rough around the edges (literally and figuratively), but it proved to be serviceable. Because I wasn't confident in either my or the 3D printer's abilities to achieve the mm level precision necessary to be a perfect fit, I made the mounting points adjustable which saved a lot of frustration in hindsight.

I didn't want to forget how to prompt it, so I printed the command on the frame. Then it was off to the printer and on to the software.
Voice Recognition and Transcription


Interestingly, the small blue 3-dot cluster in the image on the left was when I paused a bit too long between saying "hey" and "etch"
For the keyword detection I recorded numerous soundbites of myself saying "hey etch!". Then I uploaded these to Edge Impulse (I've used them previously and I appreciate that they support Raspberry Pis). To get a better output, they suggested adding in an equal number of various random "sounds" and "unknown" noises. They helpfully provided these samples (I listened to one of the sounds...I think it was a train whistle.) I ran all these through their ML pipeline and ended up with a very small but reasonably reliable keyword detection model akin to Amazon's "Hey Alexa". When I say "Hey Etch!", the code then records the ambient audio for a few seconds.
OpenAI Integration
client = OpenAI()

"""Use OpenAI's Whisper to transcribe audio."""
audio_file= open("output.wav", "rb")
transcription = client.audio.transcriptions.create(
    model="whisper-1",
    file=audio_file,
    response_format="text"
)

"""Now send the transcription to ChatGPT and get a response."""
completion = client.chat.completions.create(
    model="gpt-4o-mini",
    messages=[
        {
            "role": "user",
            "content": transcription
        }
    ]
)

answer = completion.choices[0].message.content
The code to get the OpenAI integrations working was rather trivial. It feeds the recording through their Whisper API and then pipes that output through ChatGPT. The most ironic part about this is that when asked to write this code ChatGPT insists on using the outdated OpenAI client libraries. You think it would be a top priority to fine tune the model to better promote...ya know...the thing that makes itself money. Oh well.
Image Generation
In order to achieve the ultimate goal of drawing the answer on an Etch-a-Sketch, I needed a way to visually represent the response in a way that could be graphed and subsequently mapped. I figured the simplest way to do this would be via a black and white image, with each pixel in the graph being something my Etch-A-Sketch could draw. I spent an embarrassingly large amount of time trying to find a suitable font. The sheer number of fonts available on the internet is staggering. I ultimately chose RussoOne-Regular because it seemed like it would be nice and boxy (i.e. easy for a `Sketch to draw) and also because I was tired of looking at fonts. Using the python PIL library, I was able to display the text in a small .png file.
I shortcut the graphing problem in the next step by adding a 1px underline and fiddling with the line spacing to make sure each line barely intersects with the one above it, thereby resulting in an entirely connected graph by default.
Graphing, Pathfinding, and Plotting
There were three parts to the process, the first being to connect all the pixels together in a graph. I used python's networkx library and implemented a Depth First Search to find every black pixel in the image and add it to the graph.
With the graph connected, I then implemented a pathfinding algorithm that starts in the upper leftmost black pixel (node) and visits every other pixel in the graph at least one. At the end of the algorithm I had a huge array of all the steps necessary to trace the picture.
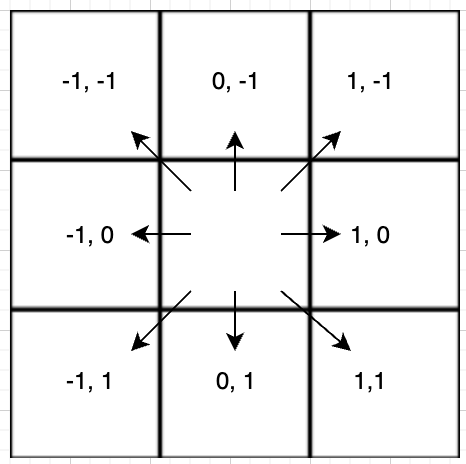
Because the 'Sketch has to draw in a single, continuous line, this meant that each move had to be to an adjacent pixel in one of the 8 diagonal or orthogonal directions. I expressed these moves as a tuple: ex. (1,0) to move a single motor step to the right.
Using the Raspberry Pis GPIO library, I then sent these series of steps to the appropriate stepper motors one at a time, with very small delays in between, which is what actually turns the knobs and draws the picture.
 def step_motor(self, dir_pin: int, step_pin: int, direction: bool, steps: int) -> None:
                        """Step a motor in the specified direction"""
                        GPIO.output(dir_pin, direction)
                        sleep(self.direction_delay)

                        for _ in range(steps):
                            GPIO.output(step_pin, GPIO.HIGH)
                            sleep(self.step_delay)
                            GPIO.output(step_pin, GPIO.LOW)
                            sleep(self.step_delay)
An interesting (and well documented) issue with the `Sketch is that the stylus doesn't immediately move when you turn the knob. This deadspace is known as "backlash". This took some trial and error to remediate but I ultimately accounted for it by detecting a change in direction in the code and adding in a fixed number of additional motor steps each time to compensate.
Motor Control
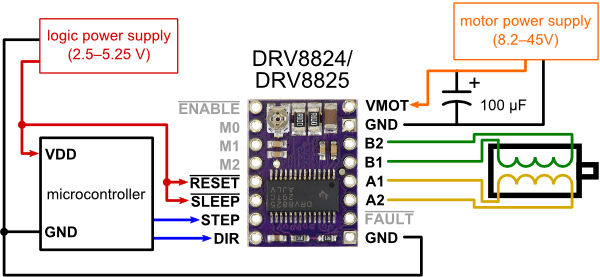
I wired up the circuit using the directions from the driver's website. I had a spare 12V laptop AC-to-DC power cord which served as my power source.
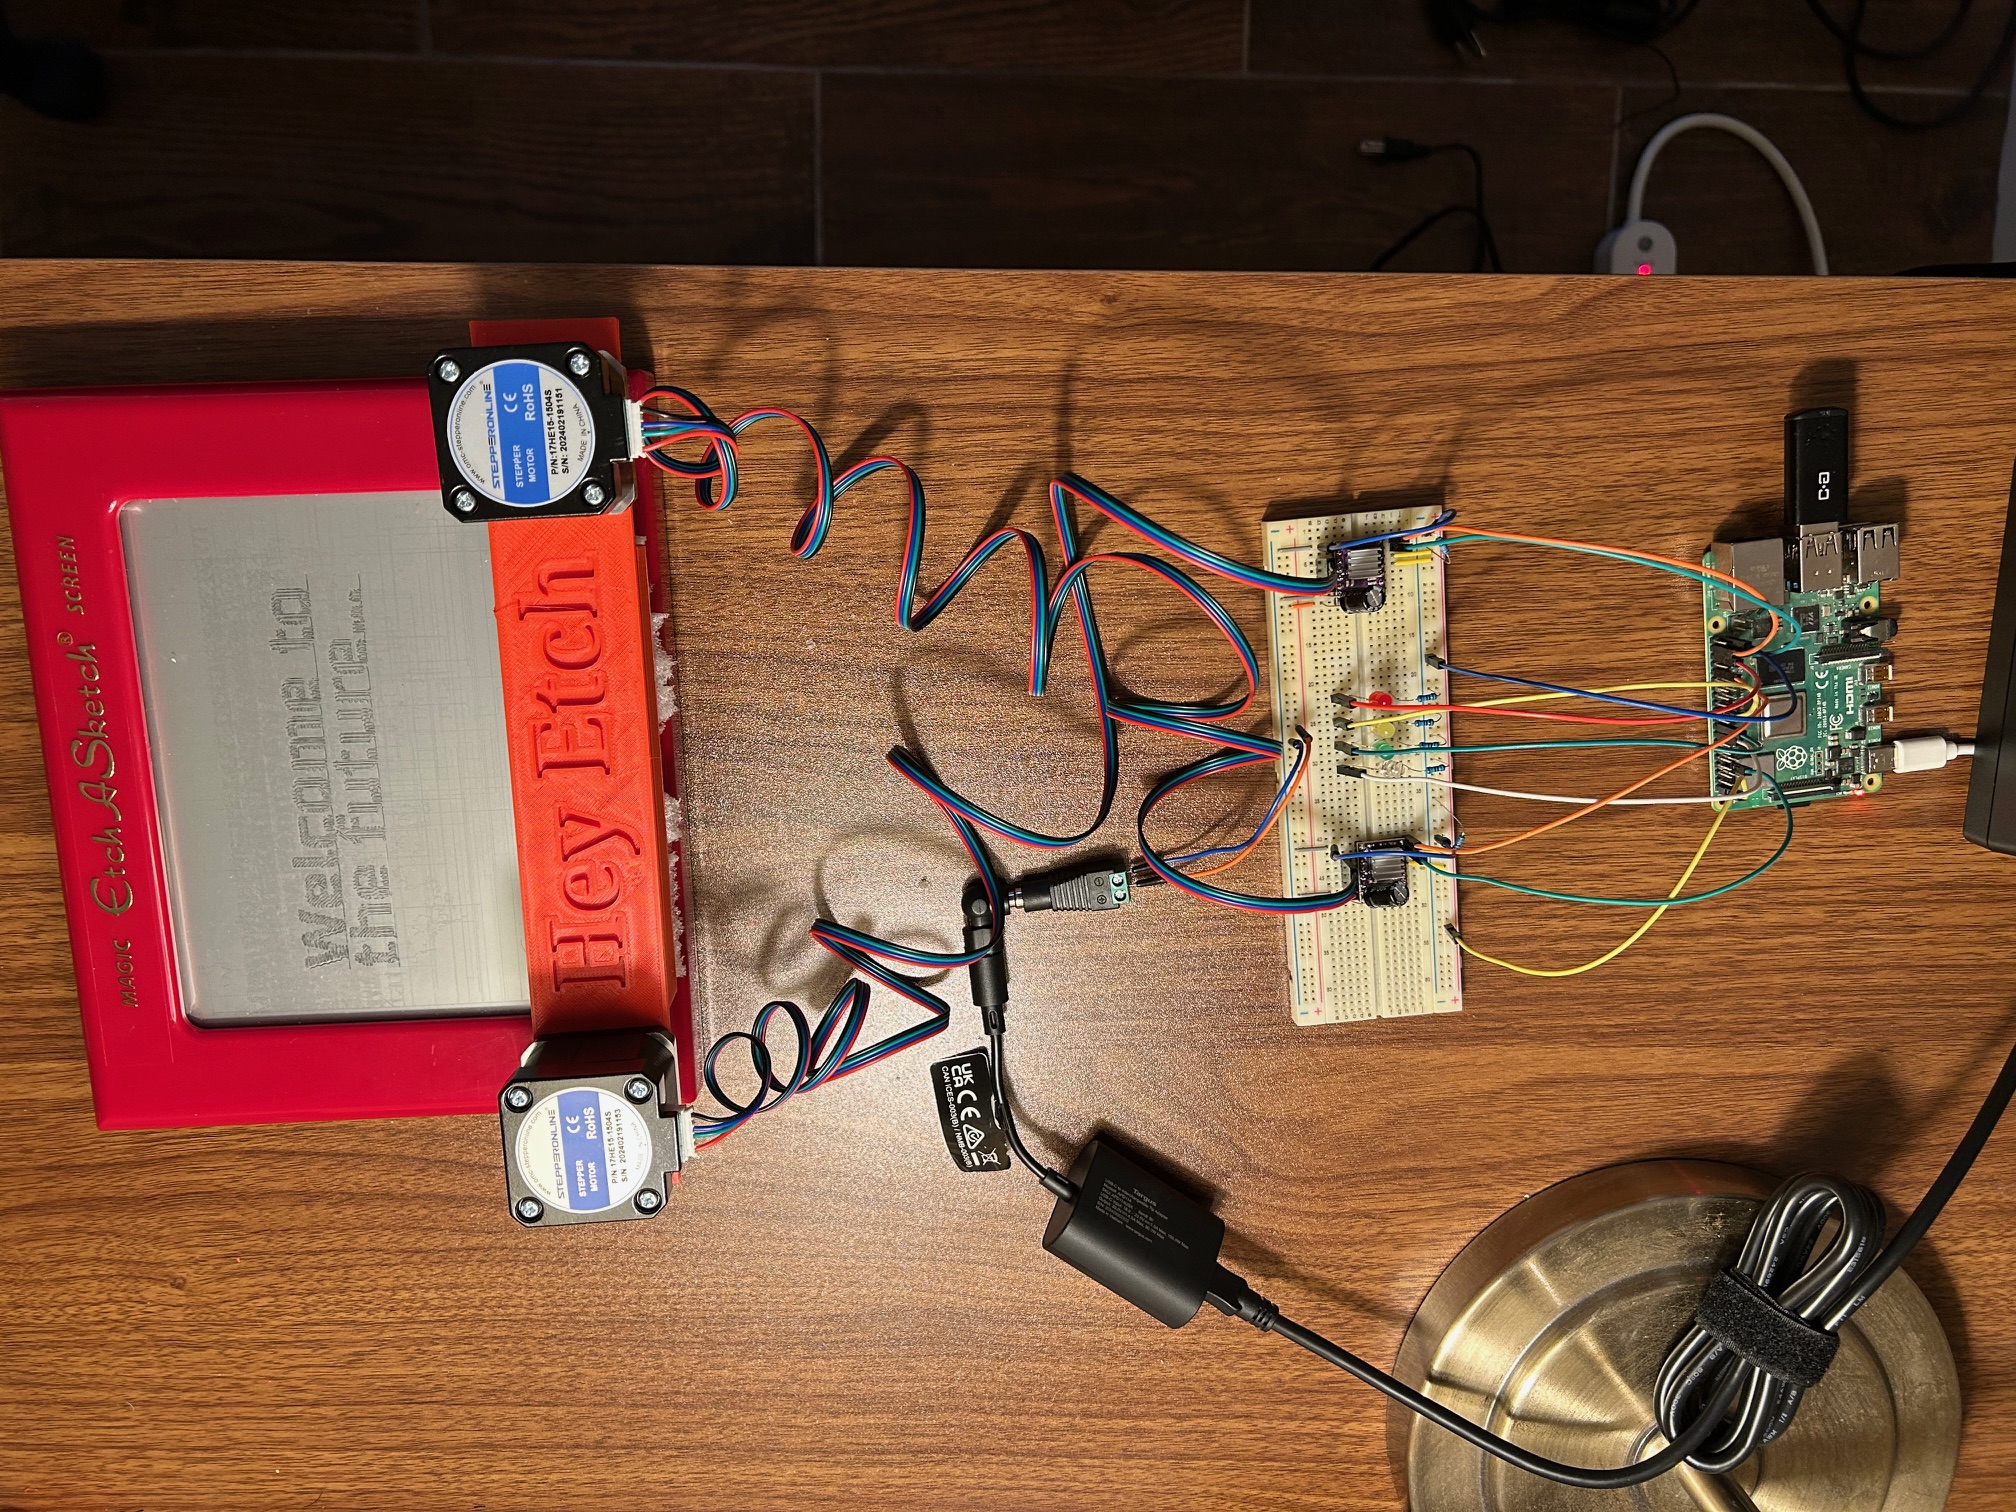
Here's the whole setup in all its glory.
It was at this juncture that I encountered quite a few issues that took a while to debug. I'll spare you the nitty-gritty details but at a high level these included:
- The Nema 17 motor connector cables come mis-wired. This is documented in just about every Amazon review for them. But still...I mean...c'mon
- I persistently received bad advice from my LLM copilots regarding the current settings for this motor. They kept urging me to crank it up, when in reality the performance was much better towards the lower end of the current rating.
- The coordinate systems between the graph algorithm and the plotting algorithm were originally misaligned. One had the origin (0,0) in the top left, the other in the bottom left.
- Most infuriatingly, I went on an hours-long debugging journey that boiled down to a broken trace on my breadboard.
Enjoying the Fruits of my Labor
With the hurdles cleared and the motors whirring away at super-human speed, I was finally able to enjoy my creation.
I was pleased that my creation was polite and helpful and did not attempt to immediately subjugate me

I asked it how it would display its output on an Etch-a-Sketch (totally meta). An unintended, but nevertheless delightful consequence of having a largely unoptimized graphing algorithm is that the user gets to play a Wheel-of-Fortune style guessing game while the graph is filling itself in
I plan to incorporate this into my daily life wherever possible.
Where Do We Go From Here?
My hope is that this project is but the first raindrop in a coming downpour of using increasingly more impractical and obscure methods for interfacing with AI. We'll know we've made it when our AI prompts are answered via scorch marks on our morning toast or morse code pulses from our electric toothbrushes. Until we reach that blessed day you'll find me dutifully marching on in pursuit of this bright future.
Acknowledgements
"If I have not seen further, it is because giants were standing on my shoulders." ~ I can't remember
"Where do you come up with this stuff??" has been a frequent question when I demonstrate this project. Inspiration doesn't develop in a vacuum, and I'd like to share a couple of the builders who inspired this project:
- Micah Tilton, whose brilliant Youtube video had helpful pointers for parts and frame design
- Martin Fitzpatrick, whose Etch-a-Snap project is an engineering marvel
There are many others who have contributed to the rich community of using microcontrollers to actuate Etch-a-Sketchs. To each of them: I salute you and I hope you accept my humble offering towards ushering us into this new and exciting age of AI.